
This tutorial assumes you’ve already logged in to RVSiteBuilder. Now let’s learn how to create a Form page
1) Click the Step 4 Page Structure option

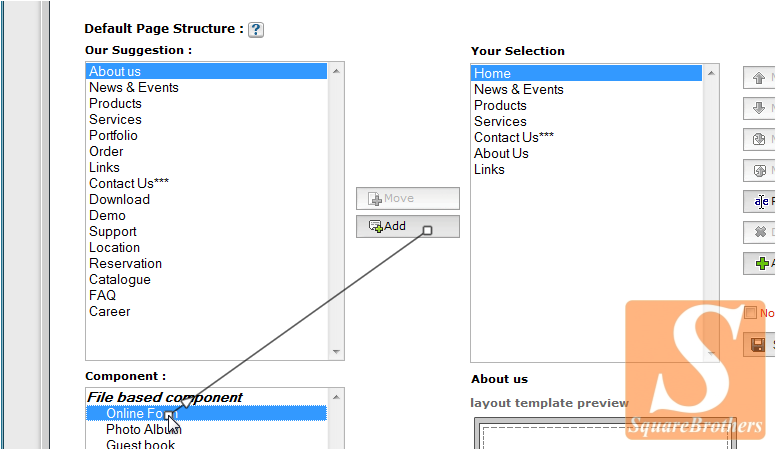
2) Select the Online Form option, then click to add it to your page structure
3) Then click Save

4) As per the warning message here, we have to setup an email address to where the form submissions will be delivered

5) Click the WYSWYG icon for the Online Form page

6) Right-click the Form control, and select Online Form

7) This is where you configure the Form Properties, including the properties of all individual text boxes that are to be included in the form. For each form component you can asign a Field Title, it’s character width, max characters, whether it’s a password field, and whether or not the field is required

8) When finished making whatever changes you want, click the Next button

9) We now see a preview of what the form will look like

10) From here we can change certain properties that define the way our form looks…. similar to table properties. Click the Next button

11) Now we must enter the email address where the form submissions are to be delivered… then click Save

12) When finished making your changes, be sure to click this Save icon

13) Anytime you make a change to your website, you have to Publish it for the effects to take effect….. click Step 7 Publish… then click Publish here

14) Click Next to overwrite the current website

15) The published site will open in a new tab

16) Here it is! Our newly created Online Form page

This is the end of the tutorial. You now know how to create form pages in RVSiteBuilder. Remember that you have to publish any changes you make for them to take effect