
This demo assumes you’ve already opened Opera.
1) Click on the Opera icon to access Mail Accounts.

2) Click Mail and Chat Accounts.

3) You will get a popup asking you to create an account. Click Yes.

4) You will get a new popup asking for the account type. Just leave Email selected.
5) Now click Next.

6) Now type your Real Name.
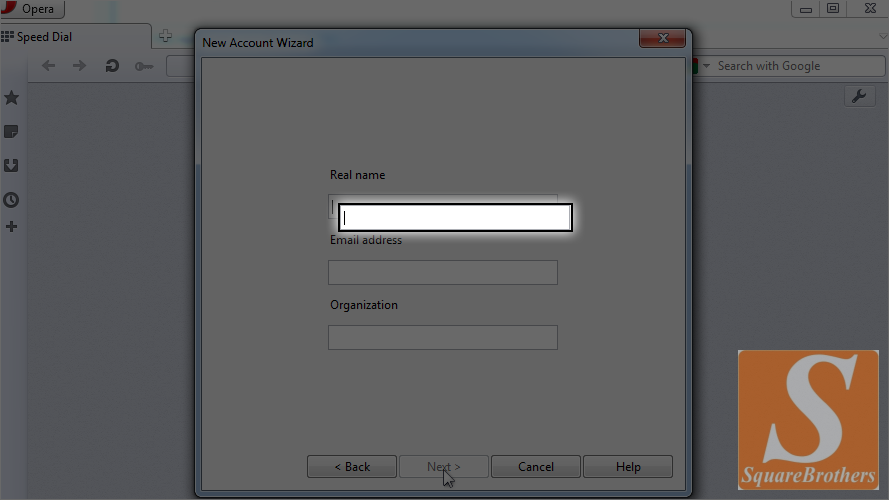
7) Type your Email Address.

8) Click on Next to continue.

9) Type your Company Name.
10) Type your username which should be your full email address, for example, username@domain.com.

11) Type your password here.
12) Make sure you leave Regular Email (POP) selected.

Generally, on a cPanel server, the mail server name format is mail.yourdomain.tld
Opera Mail has entered that by default!

13) You will be asked to enter your mail server info.
14) To keep your messages on the server, leave this box selected.

When you download email in Opera Mail, a copy is still stored on the server.
15) Also keep Until I permanently delete them checked, so they don’t get deleted when you delete them in Opera Mail.
16) Leave Use secure connection (TLS) unselected.
17) Leave Use secure connection (TLS) unselected too. We will learn about SSL account creaton in the next tutorial.
18) Click Finish to continue.

See, a sidebar has been opened.

Congratulations! You have successfully configured a POP email account in Opera Mail.
There you can see all the menu options and mail folders.
This is the end of the tutorial. Now you know how to configure a POP email account in Opera Mail.